Sysrev
SRVC can integrate with Sysrev projects. This can be used to import documents and labels, or simply as a way to synchorize data between reviewers.
Sysrev project creation
Log in or register on Sysrev.
Go to the new project page.
- Type in your project name and click “Create Project”.
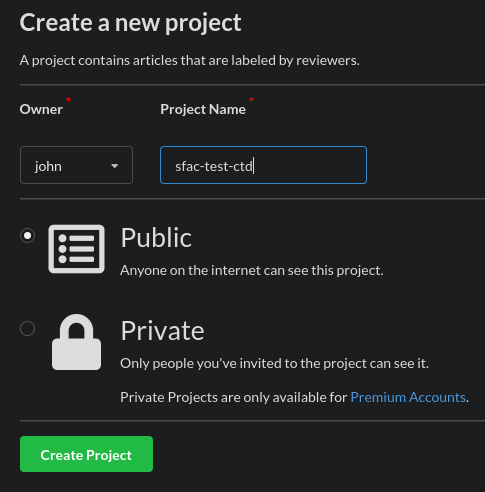
Done! The new project is ready to use.
Adding reviewers
- Click on the “Users” tab of your project.

- Invite reviewers, either by sending them the project-specific invite link, or by entering their email addresses and clicking “Send Invites”.

The reviewers you have invited will be able to add documents to the project and submit label-answers.
Creating labels
Labels created in Sysrev can be used in SRVC projects.
Click on the “Articles” tab of your project.
- Click on the “Add/Manage Articles” button.

- Click on the “Label Definitions” tab.

- Click on one of the “Add Label” buttons at the bottom of the page.

Fill out the label definition and save it.
The label is ready to be used in answer assignments.
Creating an SRVC project from a Sysrev project
Find the project’s ID number from its address. The ID number always directly follows “/p/”. E.g., if the project’s address is “https://sysrev.com/u/4957/p/122402/”, then the project ID is 122402.
Create a SRVC project directory with a file named sr.yaml.
- Add this line to sr.yaml:
base-uri: https://sysrev.com/web-api/srvc-config?project-id=PROJECT_ID
Replace PROJECT_ID with your actual project ID.
Add a flows section to sr.yaml with a sample review flow:
flows:
  review:
    steps:
      - run-embedded: generator https://sysrev.com/web-api/srvc-events?project-id=PROJECT_ID

      - run-embedded: label-web
        labels: [overall include]
        port: 6000
Again, replace PROJECT_ID with your actual project ID.
This flow uses the default “overall include” label for all Sysrev projects. Change the labels entry to include the names of any other labels that you have added to the Sysrev project.
Running the review flow
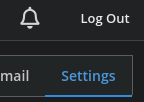
- Go to the Sysrev user settings page
- Find the “Enable Developer Account” section and make sure that your Developer Account is enabled.

In this same section, find your “API Key” and copy it.
- Set the SRVC_TOKEN environment variable to your API key.
This can be done with the following shell commmand, with API_KEY replaced with your actual API key:
export SRVC_TOKEN=API_KEY
- If you are running SRVC in GitHub Codespaces, you can instead use encrypted secrets to store your SRVC_TOKEN.
Use Managing encrypted secrets for your codespaces to create a secret named SRVC_TOKEN with a value equal to your Sysrev Developer API Key.
- Run the review flow via “sr flow review”.
You should see the message “Listening on http://localhost:6000”
View http://localhost:6000 in your browser and assign the appropriate label answers.
Documents, labels, and answers should be synchronized across all reviewers using this Sysrev project.
- If the documents and labels were created in Sysrev, then answers should be also be visible on Sysrev.
If they were created in SRVC but not in Sysrev, then they will not be visible on Sysrev. The data is there, however, and it will still appear in SRVC.